

How to Paint Pre Waxed Canvas the Right Way
- Anise Ahmad
- May 23
- 6 min read
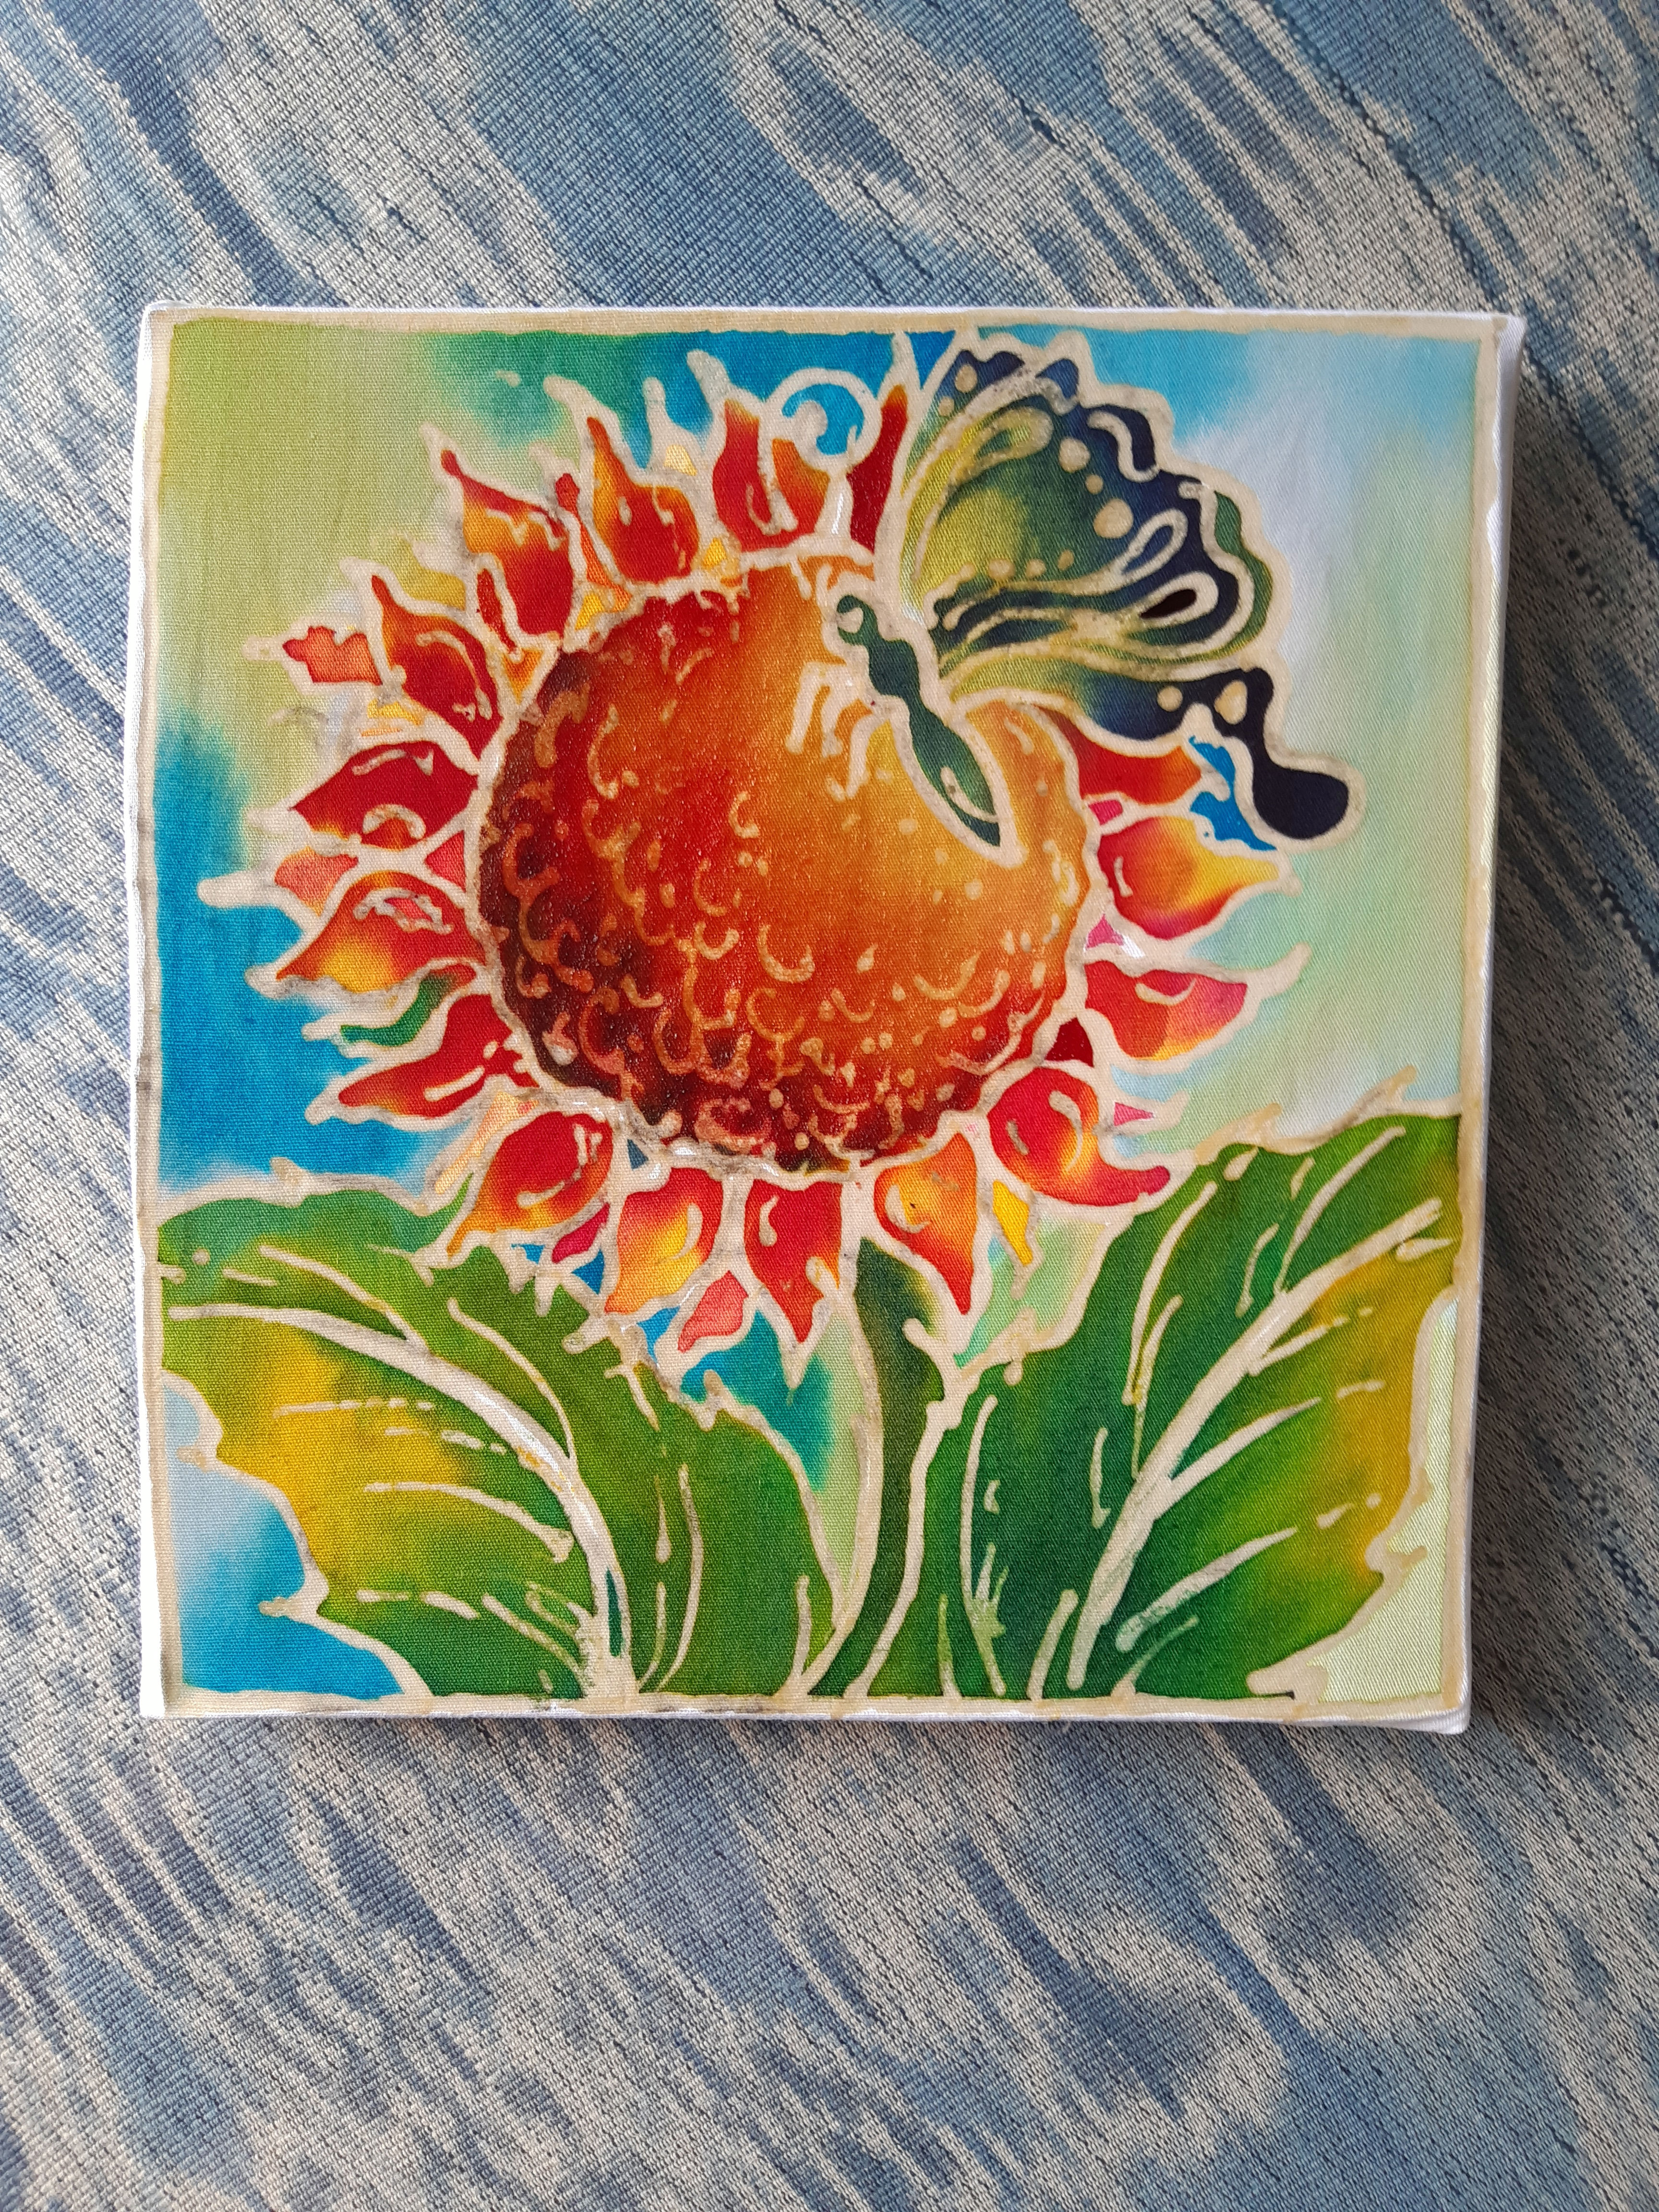
The first surprise with batik is that the wax does a lot of the hard work for you. If you are wondering how to paint pre waxed canvas, the good news is that you do not need to draw wax lines yourself or master traditional resist techniques before you begin. The design is already outlined, so your job is to bring it to life with color.
That makes pre-waxed canvas especially appealing for beginners, kids, classrooms, and anyone who wants a creative project that feels artisanal without being fussy. You still get the look and spirit of batik, but with a much easier starting point. The trick is understanding how the fabric, wax, and dye or paint behave together.
How to paint pre waxed canvas without muddy color
Pre-waxed canvas has wax barriers already applied to the surface. Those lines resist liquid color and help keep sections separated. In practice, that means you can paint one area at a time and let the wax guide the pattern. It is simpler than freehand batik, but it still rewards a light touch.
Before you start, set up your workspace so the canvas can lie flat. Put down a protective sheet or paper underneath, and keep a small cup of water, a palette, and a cloth or paper towel nearby. If your kit includes batik dyes, use those as directed. If you are choosing your own medium, thin fabric-friendly color usually works better than anything thick and chalky.
The biggest beginner mistake is using too much liquid at once. When a brush is overloaded, color can pool against the wax lines and sometimes creep where you do not want it. Instead, pick up a modest amount of color and build it gradually. You can always add another layer, but it is harder to fix oversaturation.
What to prepare before painting
A little preparation gives you a much smoother session. Check the canvas first and make sure the wax lines are intact and clearly visible. If the surface has been folded or stored for a while, handle it gently so you do not crack the wax before you begin painting.
Choose your colors before the first brushstroke. This sounds basic, but it saves a lot of hesitation once the paint starts flowing. Batik designs often look best when the palette is limited and intentional. Two to five colors can create a strong result without making the piece feel crowded.
It also helps to test your color intensity on a scrap surface or the corner of a paper towel. Some dyes dry lighter than they look in the palette, while some paints appear more vivid once absorbed into fabric. If you are working with children or a group, pre-portioning colors into small trays keeps the process cleaner and more manageable.
Pick the right brush size
Brush size matters more than many beginners expect. A medium round brush is often the most useful choice because it can cover larger shapes while still fitting into smaller sections. For tight spaces, switch to a smaller tip rather than trying to force a large brush into narrow areas.
A brush that is too stiff can drag across the wax lines and deposit color unevenly. Softer brushes usually give better control on pre-waxed fabric surfaces.
Decide between transparent and bold color
This is partly a style choice. Transparent color lets the fabric texture show through and creates that classic hand-dyed feel. More concentrated color gives a brighter, more graphic finish. Neither is wrong.
If you want a traditional batik look, start lighter and allow the colors to breathe. If you are painting with kids or making party projects, brighter and bolder shades can feel more cheerful and easier to appreciate right away.
Step by step: how to paint pre waxed canvas
Start with the lightest colors first. This keeps accidental blending from turning everything darker too quickly. Yellow, pale blue, soft pink, and light green are usually easier to place before deeper shades like navy, red, or black.
Touch the brush to one section of the design and let the color spread naturally across the fabric. You do not need to scrub it in. In fact, brushing too aggressively can roughen the surface and cause uneven patches. Guide the paint gently toward the wax border and stop when the section is filled.
Work one area at a time. This gives you more control and helps you notice how quickly your medium absorbs. Some pre-waxed pieces take color fast, while others need a second pass for a richer finish. That is normal.
Leave a little drying time before painting directly beside a very wet area, especially if the spaces are small. Wax lines help separate sections, but if both sides are drenched at once, color may still migrate. Patience gives you cleaner edges.
If you want a shaded effect, apply one color first, then touch in a second color while the first is still damp. The two can blend softly inside the section without crossing the wax outline. This is a nice way to add depth to petals, leaves, wings, or abstract shapes without making the project complicated.
Common problems and how to avoid them
Bleeding is the issue most people worry about. Usually, it happens because the brush is too wet, the fabric is oversaturated, or nearby sections are painted while still soaking. Using less liquid solves most of it.
Patchy color is another common frustration. That can happen when the brush runs out mid-section or when the first layer dries before the area is fully covered. The fix is simple: re-wet the section lightly and smooth in another thin layer rather than dumping on more paint.
Sometimes beginners are tempted to paint over the wax lines. Try not to. The dark or raised outline is part of the batik character. It gives the finished piece its handcrafted definition.
If a color looks dull, it may need another layer after drying. Fabric often softens color on the first application. Building intensity slowly usually looks better than trying to get maximum brightness in one pass.
Best practices for kids, classrooms, and group projects
Pre-waxed batik canvas works especially well in group settings because everyone can start painting right away. There is no hot wax setup, no design transfer stage, and far less waiting around. That is a big reason these projects feel approachable for family craft time, school art sessions, and events.
For younger painters, it helps to keep the color range simple. Too many choices can slow them down and lead to muddy mixing. Three or four colors is often enough for a design to feel lively.
For teachers and organizers, drying space matters. Lay finished pieces flat and label them clearly if several people are working together. If your group is large, stagger the painting process so some participants are choosing colors while others are already working.
A ready-to-paint batik set is often the easiest route because the tools are already matched to the project. That removes guesswork, which is useful when you want a creative experience to feel smooth rather than overly technical.
After painting: drying and display
Once your canvas is painted, let it dry completely on a flat surface. Avoid stacking or rolling it while damp. Even if the top feels dry, the fabric underneath may still hold moisture.
Whether the wax stays in place or is removed depends on the style of piece and the instructions that came with it. Some decorative batik projects are meant to keep the wax-defined look as part of the finished artwork. Others may involve a later finishing step. If you are using a pre-designed kit, follow the included directions rather than guessing.
After drying, your painted canvas can be framed, mounted, or used as a display piece for home, school, or gifting. That is part of the charm - the project begins as an easy activity and ends as something that looks thoughtful and handmade.
Why pre-waxed canvas is such a good starting point
Traditional batik has deep roots and a beautiful process, but the waxing stage can feel intimidating to first-timers. Pre-waxed canvas removes that barrier while still preserving the visual language of batik: the resist lines, the flowing color, and the pleasure of filling each section by hand.
For many people, that is the ideal balance. You get authenticity in the look and feel, but the process is friendly enough for a rainy afternoon, a classroom table, or a creative gift experience. That is exactly why brands like Tumadi Batik have made these projects so appealing to modern crafters.
If your first piece is not perfect, that is part of the beauty too. Batik has always carried a handmade character. Clean edges help, but so does personality. Start light, paint patiently, and let the wax guide you - the canvas already knows where the design wants to go.


Comments